How to Grant Developer or Team Access in Hostinger
Hostinger makes it easy to safely share account access with developers, marketers, or teammates using its built-in Access Manager (also called Account Sharing or delegate access). The process takes less than a minute and lets you collaborate without sharing passwords or compromising your site’s security.
Want us to handle this for you?
If you’d rather not deal with technical settings or risk breaking something, our team can take care of it quickly and safely.
Log into your Hostinger dashboard
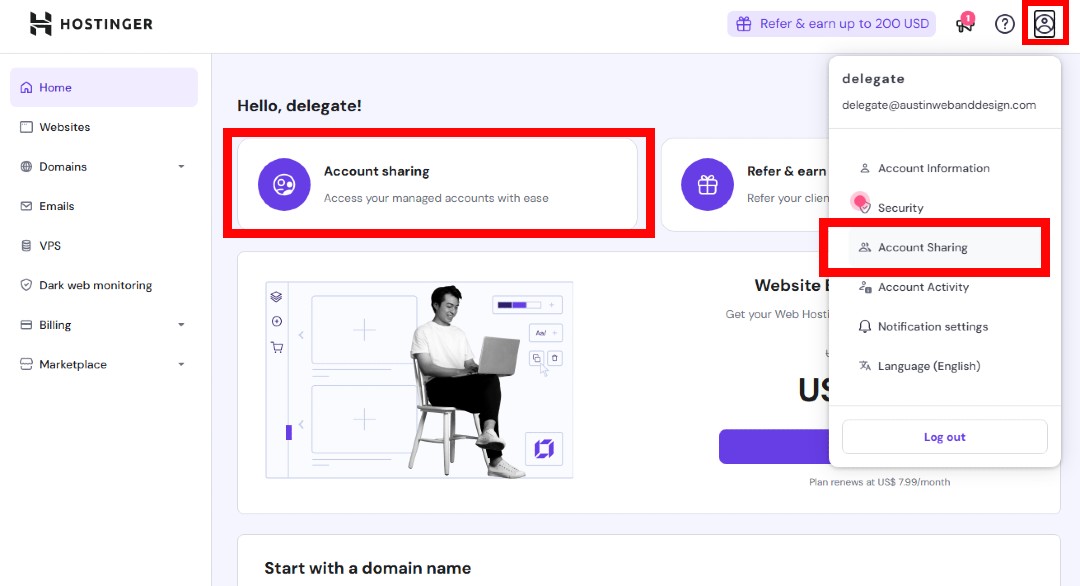
Go to the Hostinger login page and sign in. Once logged in, locate Account Sharing either from the top-left menu or by clicking your circular profile icon in the upper-right corner of the dashboard. Select Account Sharing from the dropdown menu (Fig. 1).
Open “Grant access”
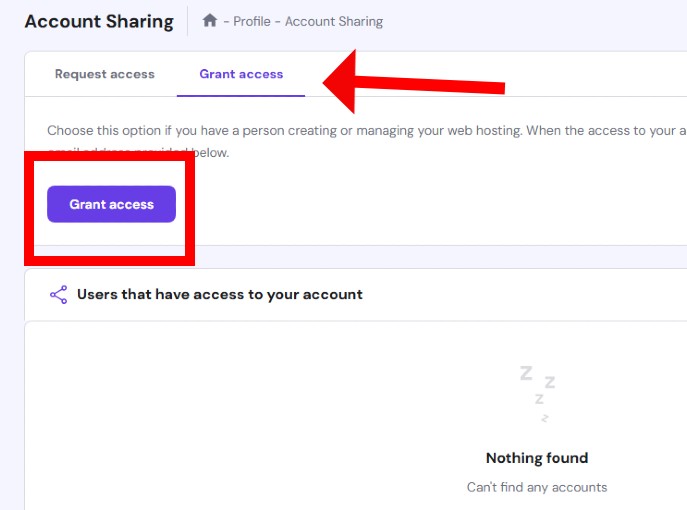
On the Account Sharing screen, click the purple Grant access button at the top. This opens a short form where you define who you’re inviting and what level of access they’ll have (Fig. 2).
Fill in the access invite
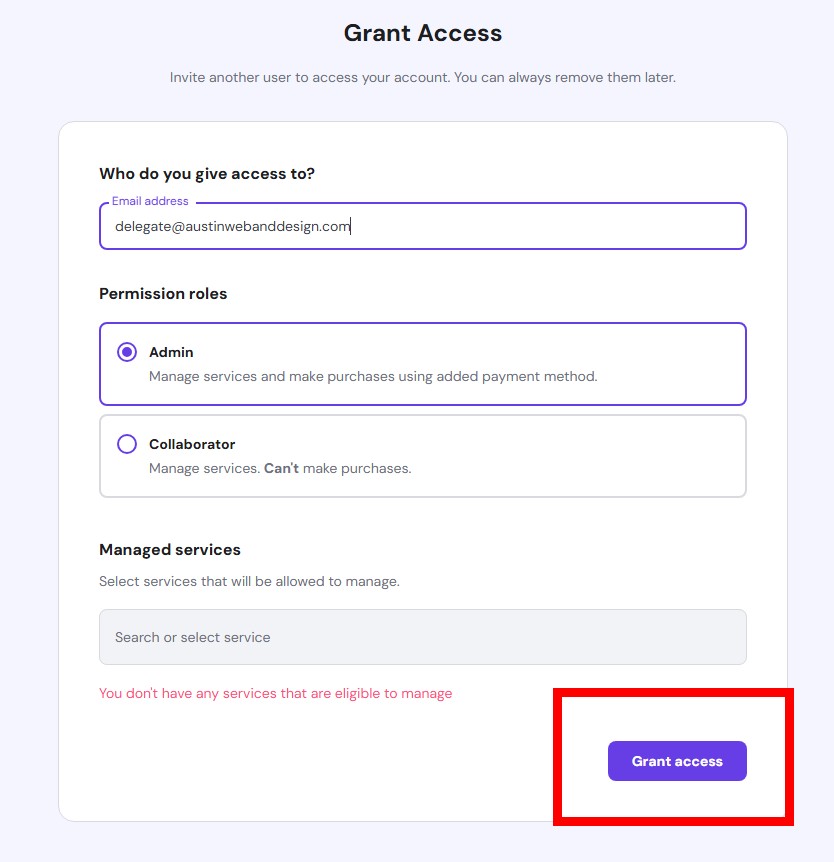
- Email address – Enter the email associated with your collaborator’s Hostinger account.
If you’re granting access to Austin Web & Design, use [email protected]. - Access level –
- Manage services + billing (full access, including purchases)
- Manage services (no billing) (recommended for developers)
- Services – Choose All services or select specific hosting plans, domains, or email services.
Click Grant access and Hostinger will immediately send an email invitation to the user (Fig. 3).
Delegate accepts the invitation
Your teammate clicks the link in their email, signs in to Hostinger (or creates a free account if needed), and gains instant access. Until they accept, their status will show as Pending on your Account Sharing page.
Rather have this handled for you?
If you’d rather not deal with settings, permissions, or technical details, our team can take care of this quickly and safely.
- Correct setup and permissions
- Secure configuration (no password sharing)
- Clean documentation and handoff
Manage or revoke Hostinger access
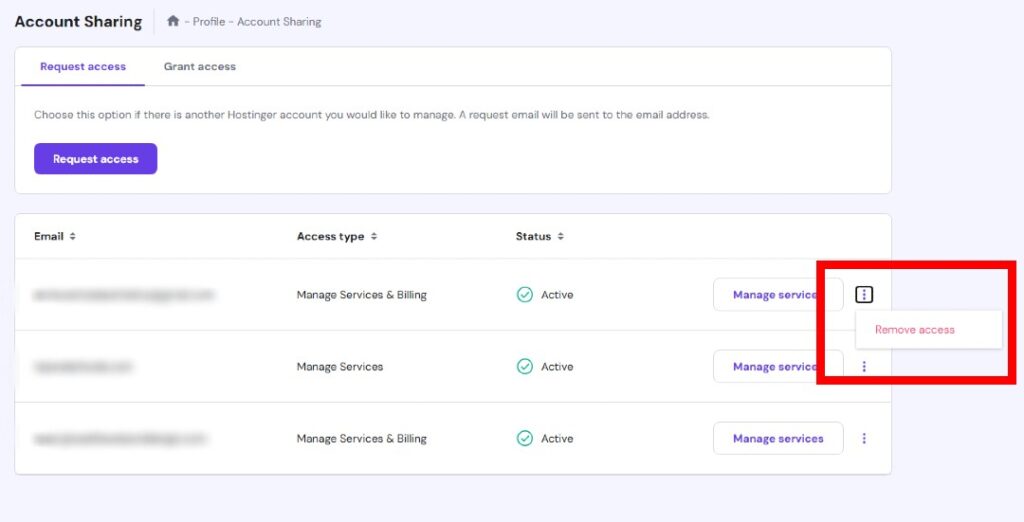
If you ever need to change or remove access, return to Account Sharing. Click the “…” menu next to a user’s name and select Remove access. The change takes effect immediately (Fig. 4).
Using Hostinger’s delegate access keeps collaboration simple, secure, and professional — no shared passwords, no lingering “temporary” access, and full control over who can manage your services.
Need help with this or anything else?
If you’d rather not deal with ongoing updates, settings, or technical issues, our team can handle fixes, support, and long-term maintenance for you.
Related Access Guides
If you use additional hosting, DNS, or website platforms, these guides explain how to safely grant access without sharing passwords.
